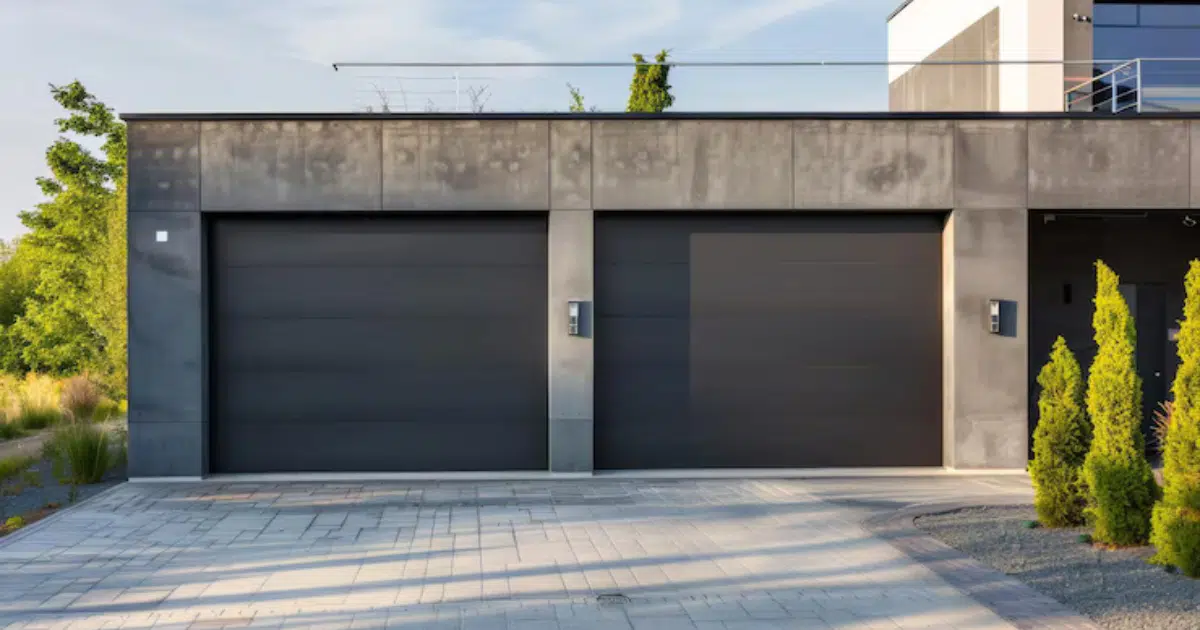
Buying a garage door is only half the decision. What happens after the purchase, how it gets installed, how it gets maintained, and how it holds up over the years, determines whether you got a smart investment or an expensive mistake. Doorlink garage doors are built to last, but even the best-built door needs proper installation, access to reliable garage door repair service, and consistent care to deliver on that promise.
This guide covers everything homeowners need to know about getting a Doorlink door installed correctly, keeping it in good working condition through the years, and understanding the long-term value that makes this brand worth choosing in the first place. If you are in Lawndale, NC, or the surrounding area and planning a garage door project, this is the kind of information that will save you time, money, and unnecessary headaches down the road.
Why Professional Installation Is Non-Negotiable
There is a reason why garage door installation is not a standard DIY project. It involves calibrated spring tension, precise track alignment, balanced panel weight, and properly secured hardware, all of which need to work together as a system from the very first operation. Getting any one of these wrong does not just affect performance. It can create safety risks and accelerate wear across the entire system.
Here is what is at stake when installation is done incorrectly:
- A door that is not properly balanced puts constant excess strain on the opener motor, wearing it out faster than it should.
- Misaligned tracks cause uneven wear on rollers and panels, leading to binding and eventual damage.
- Improperly secured hardware can loosen over time and become a safety hazard during operation.
- An incorrect spring setup can increase the risk of early failure, making broken garage door spring repair more likely.
- Installation errors in most cases void the Doorlink manufacturer’s warranty, leaving the homeowner without coverage when something goes wrong.
If you are planning a garage door upgrade, read What Makes Doorlink Garage Doors a Smart Choice for Your Home?

What a Proper Doorlink Installation Actually Involves
Understanding what goes into a correct installation helps homeowners ask the right questions and recognize quality work when they see it. A thorough Doorlink installation covers several key steps.
Site assessment and measurement:
- The technician measures the opening width, height, headroom above the door, side room along the walls, and backroom depth into the garage.
- These measurements determine which Doorlink model and configuration will fit correctly.
- An incorrect measurement at this stage creates problems that are expensive to correct later.
Track installation and alignment:
- Vertical and horizontal tracks are installed level and square using a precision level.
- Tracks that are even slightly off will cause the door to bind, wear unevenly, or come off the track during operation.
- The technician makes precise adjustments before securing the tracks permanently.
Panel assembly and hanging:
- Panels are assembled section by section from the bottom up.
- Each panel is checked for alignment before moving to the next.
- Hinges connecting the panels are secured properly, and rollers are seated correctly in the track before the door is tested.
Opener installation and calibration:
- The garage door opener is mounted, the drive mechanism is connected, and travel limits are set.
- Force sensitivity is calibrated so the auto-reverse feature triggers correctly when resistance is met.
- This calibration is a critical safety setting that must be precise from the start.
Final testing and safety checks:
- The door is run through several open and closed cycles to confirm smooth, consistent operation.
- The auto-reverse feature is tested using a flat object placed in the door’s path.
- The manual release is tested to confirm it disengages and re-engages properly.
- Any adjustments needed are completed before the technician leaves the site.
Even with proper installation, issues can still develop over time, and common problems like uneven movement, unusual noise, or failure to close properly are outlined in garage door troubleshooting guidance, which explains how early warning signs often point to underlying system problems.
Red Flags to Watch for During or After Installation
Even when hiring a professional, knowing what a correct installation looks like helps homeowners raise concerns if something does not seem right. Watch for these warning signs:
- The door hesitates, jerks, or makes grinding sounds during its first few cycles.
- Visible gaps appear along the sides or top of the door when it is fully closed.
- The door does not sit level at the bottom when closed, indicating a track or panel alignment issue.
- The opener runs continuously past the fully open or fully closed position before stopping.
- The auto-reverse test fails, meaning the door does not reverse when an object is placed in its path.
- The door feels noticeably heavier on one side when operated manually.
- Any hardware such as hinges or brackets appears loose or improperly seated right after installation.
Building a Maintenance Routine That Actually Works
Maintenance is where most homeowners fall short, not because they do not care, but because garage doors do not demand attention the way other home systems do. They just keep working until something goes wrong. A simple, consistent maintenance routine keeps a Doorlink door performing well and extends its service life significantly.
Lubrication of moving parts:
- Apply a dedicated garage door lubricant to rollers, hinges, and bearing plates two to four times per year.
- Avoid general-purpose sprays as they can strip existing lubrication and attract debris.
- Wipe away any excess lubricant after application to keep components clean.
Weather seal inspection:
- Check the bottom seal and perimeter seals at least twice a year for cracks, tears, or separation.
- In a humid climate like North Carolina’s, a failed seal allows moisture intrusion that can cause rust and structural damage quickly.
- Replace worn seals promptly. This is one of the most cost-effective maintenance tasks available.
Visual inspection of hardware:
- Every few months, inspect hinges, rollers, cables, and track mounting brackets for rust, cracking, or deformation.
- Tighten loose bolts with a socket wrench, but avoid over-tightening, which can strip threads or warp brackets.
- Flag any component showing visible damage for professional assessment rather than attempting a repair without proper knowledge.
Balance test:
- Disconnect the opener and manually lift the door to about waist height, then release it.
- A properly balanced door will stay in place or drift only slightly.
- A door that drops quickly or rises on its own is out of balance and needs professional adjustment.
- Perform this test once or twice per year as a standard check.
Auto-reverse safety test:
- Place a flat object on the ground in the door’s path and close the door using the opener.
- The door should reverse immediately upon contact with the object.
- If it does not, the opener’s sensitivity settings need to be adjusted by a technician right away.
- This is a safety-critical check that should never be skipped during routine maintenance.
Routine upkeep and professional servicing are emphasized in garage door care and maintenance guidance, which highlights how consistent inspection and proper care extend system lifespan and improve performance.
For a deeper understanding of how the hardware and engineering inside your Doorlink door connect to the maintenance tasks that protect it, Doorlink Garage Door Technology: The Features That Make It Worth It covers the internal systems in detail.
Seasonal Maintenance Considerations for North Carolina Homeowners
Living in North Carolina means dealing with a climate that swings between humid summers and cold winters. These conditions affect garage doors in specific ways that homeowners in the region should plan for throughout the year.
Summer months:
- High humidity accelerates rust on exposed metal surfaces and can cause composite trim elements to swell slightly.
- Keep the door’s finish intact and inspect seals before the hottest months to limit moisture intrusion.
- Clean the track interior after heavy pollen season, as pollen buildup creates a gritty residue that increases friction on rollers.
Colder months:
- Lubricant on moving parts can thicken in cold temperatures, reducing its effectiveness. Use a lubricant rated for a wide temperature range.
- The bottom seal can freeze to the ground overnight when moisture is present. Never force the door open when the seal is frozen, as this can tear the seal away from the door entirely.
- Allow any frozen seal to thaw completely before operating the door.
Year-round awareness:
- After any major storm, do a quick visual inspection of the door panels, hardware, and seals for impact damage or debris buildup in the track.
- Check that the track mounting brackets are still tight and properly secured to the wall after periods of high wind or temperature extremes.
When to Call a Professional vs. Handle It Yourself
Knowing where the line is between what a homeowner can handle and what requires a professional technician is one of the most practical things to understand about garage door ownership.
Homeowners can safely handle:
- Applying lubricant to rollers, hinges, and bearing plates.
- Replace the bottom weather seal if it pulls away cleanly and the new seal is a direct match.
- Cleaning the track interior with a dry cloth.
- Testing the auto-reverse feature and adjusting sensitivity settings on the opener per the manufacturer’s instructions.
- Tightening loose bolts on hinges and track brackets with a socket wrench.
Professionals should handle:
- Any adjustment or replacement of cables that are under significant tension.
- Track realignment if the door is binding or coming off the track.
- Opener motor issues, limit adjustments beyond basic sensitivity settings, and circuit board problems.
- Any structural panel damage that affects how the door hangs or seals.
- Full system inspections to assess overall hardware health and identify wear patterns before they become failures.
Understanding the Long-Term Value of a Doorlink Garage Door
Value in a garage door is not just about the purchase price. It is about the total cost of ownership over the door’s lifespan, factoring in installation quality, maintenance requirements, repair frequency, and how long the door remains in good condition before replacement becomes necessary.
Here is what long-term Doorlink ownership typically looks like for homeowners who start correctly:
- The door serves reliably for 20 to 30 years with proper installation and consistent maintenance.
- Primary costs over that period are routine lubrication, occasional hardware replacement, and weather seal renewal, none of which are significant expenses when spaced across decades.
- The door’s finish holds up longer than budget alternatives, reducing the likelihood of an early cosmetic replacement.
- A well-maintained door contributes meaningfully to curb appeal and resale value, something real estate professionals consistently note as a factor buyers notice immediately.
- Fewer emergency repair calls compared to lower-quality doors that need more frequent attention over the same period.
Getting the Most Out of Your Investment From Day One
The single most important thing a homeowner can do to protect their investment in a Doorlink garage door is to start correctly. That means choosing the right model, having it professionally installed, and establishing a maintenance routine from the beginning rather than waiting for something to go wrong.
Key steps to maximize your investment from the start:
- Choose a model that matches your home’s architecture, climate needs, and how you actually use the garage.
- Confirm the installer’s experience with Doorlink products specifically before committing to a contractor.
- Schedule a professional inspection within the first year of installation to catch any early wear or calibration drift.
- Set a simple calendar reminder for seasonal maintenance tasks so they do not get pushed aside.
- Keep the installer’s contact information accessible so that any concerns get addressed before they develop into a larger issue.
For homeowners still in the selection phase who want guidance on matching the right Doorlink model to their home’s specific needs, Doorlink Garage Door Models: Which One Is Right for Your Home? covers every option in the lineup with practical, side-by-side guidance that makes the decision straightforward.
A Long-Term Investment Worth Protecting
A Doorlink garage door is not just a purchase. It is a commitment to a part of your home that gets used every single day. When that door is installed correctly and maintained consistently, it repays that commitment with years of reliable, quiet, and secure operation that most homeowners never have to think twice about.
If you are in Lawndale, NC, and want help getting your Doorlink installation done right or need a professional maintenance check on a door that has not been serviced in a while, Cleveland County Garage Doors is the team to call. We bring hands-on experience with Doorlink products and a commitment to getting every job done to the standard your home deserves. Contact us or give us a call today to schedule your appointment and take the guesswork out of your garage door investment.